> ## Documentation Index
> Fetch the complete documentation index at: https://docs.runpulse.com/llms.txt
> Use this file to discover all available pages before exploring further.
# Build Your First Pipeline
> Create, test, save, and export a complete Pulse pipeline from the Platform.
This walkthrough builds a simple invoice extraction workflow in the Platform, then turns it into production-ready code.
## Target Workflow
```mermaid theme={null}
flowchart LR
A[Invoice PDF] --> B[Extract]
B --> C[Schema]
C --> D[Invoice JSON]
D --> E[Show Code]
```
## Steps
Go to the Platform and open **New Extraction** from the sidebar.
Use a real sample format if you can. Representative documents matter more than perfect toy examples.
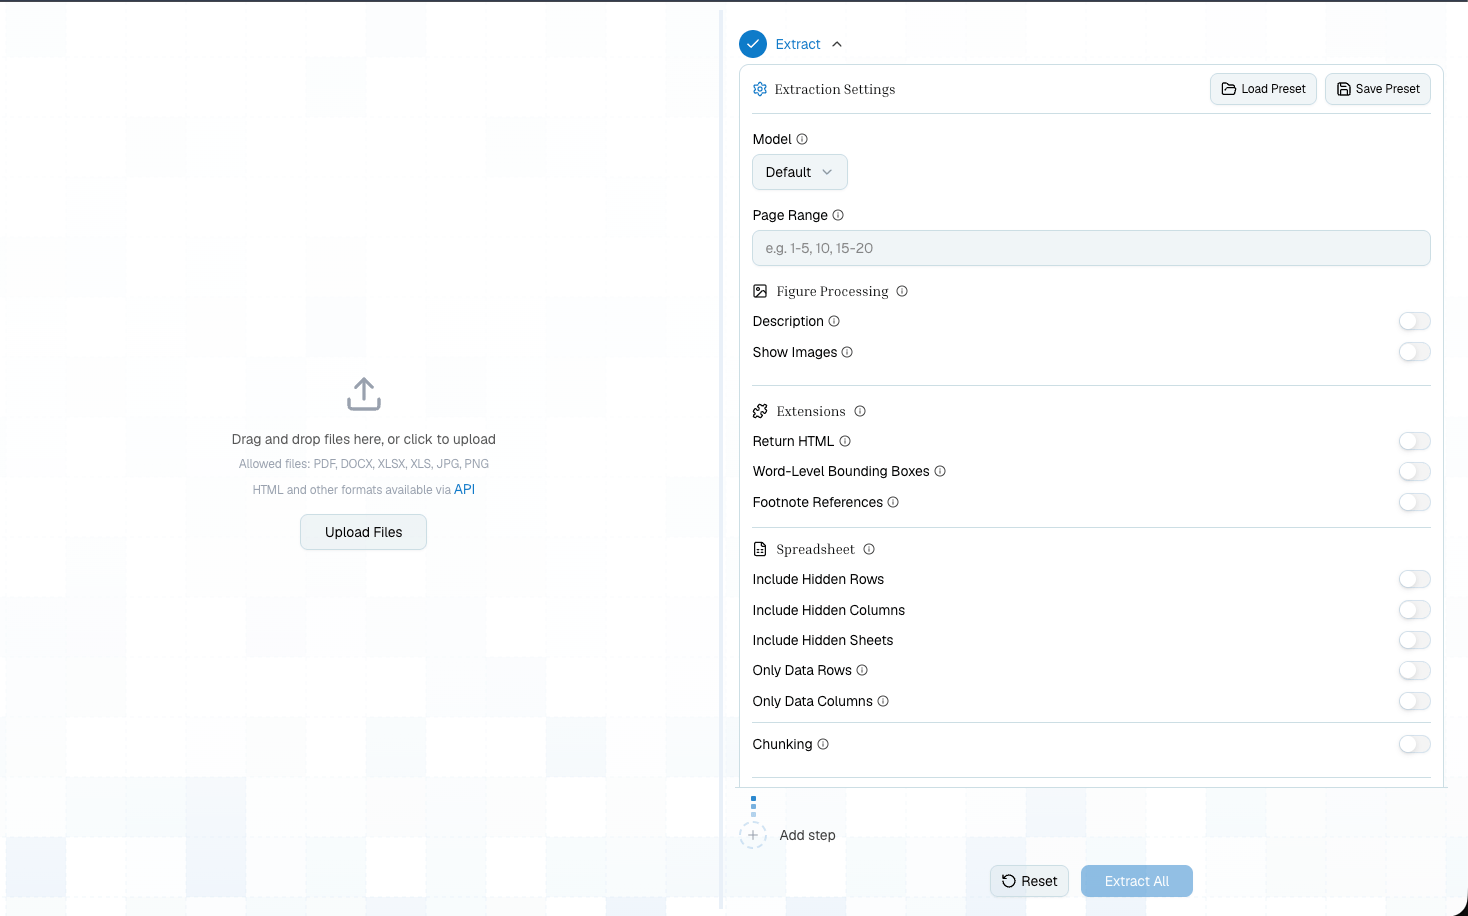
Keep the first run simple. Run Extract and inspect the Markdown and Tables tabs so you know what Pulse saw.
Add a Schema step. Start with the fields you need in production: invoice number, vendor, dates, total, and line items.
Confirm the output values point to the right source locations. If a field is ambiguous, improve its description or add a schema prompt.
Save the schema once it works on more than one invoice. This gives you a `schema_config_id` for production code.
Open Show Code and choose Python, TypeScript, or cURL. The generated code will match your tested configuration.
## Visual Walkthrough
Start with a single Extract step and keep the first run simple.
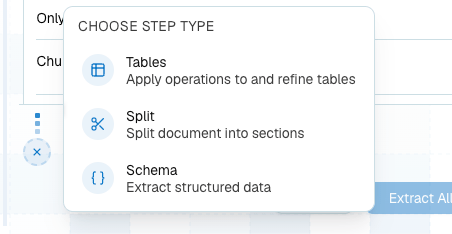
 Add the next step from the pipeline menu once the extraction output looks usable.
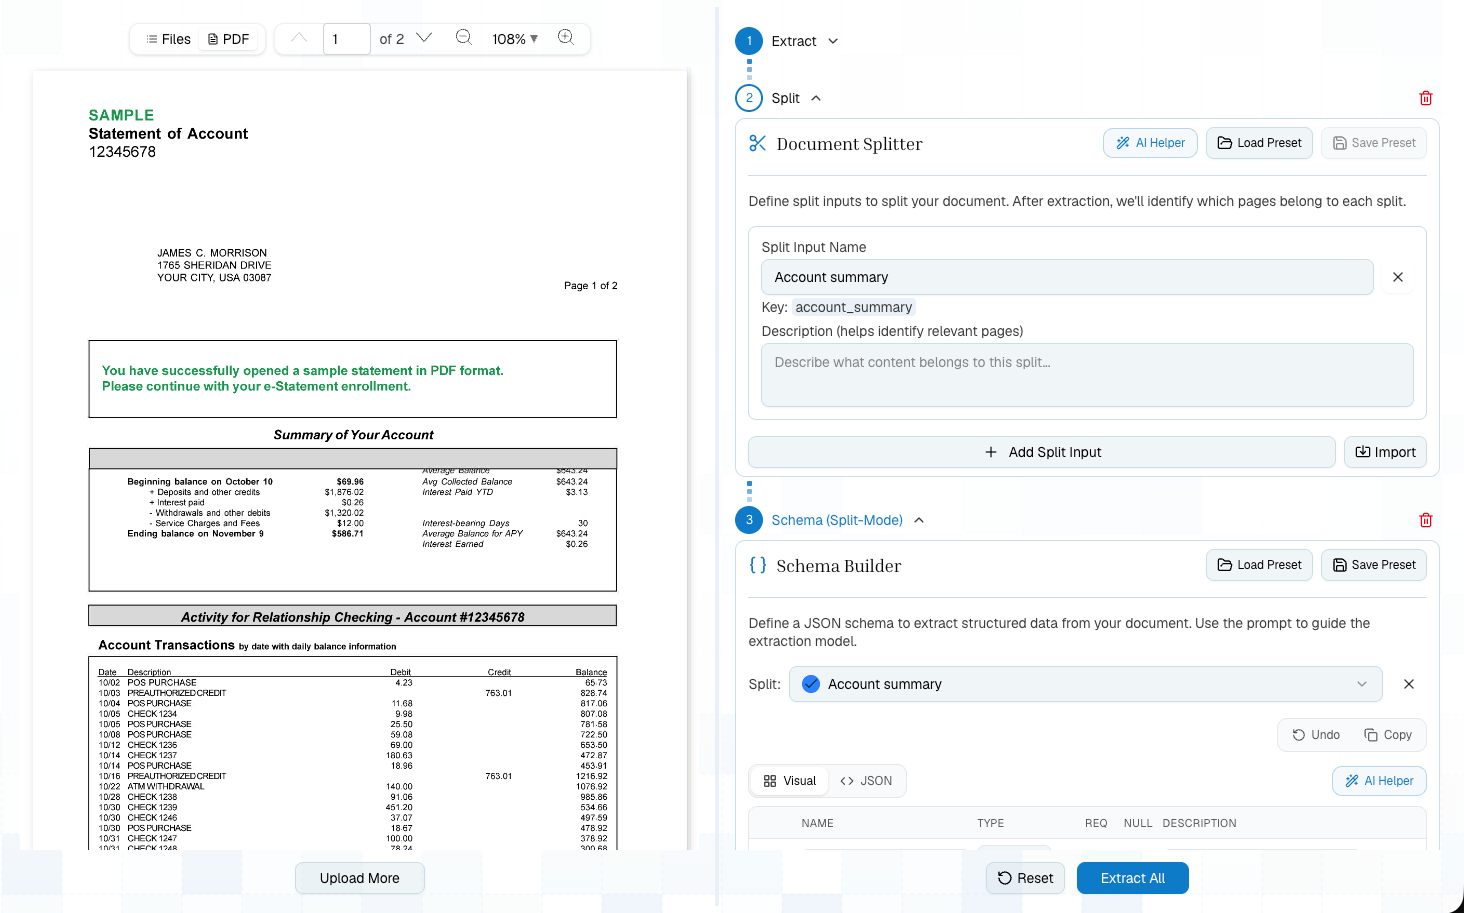
 Configure each step in the right-side panel. For this tutorial, add Schema after Extract.
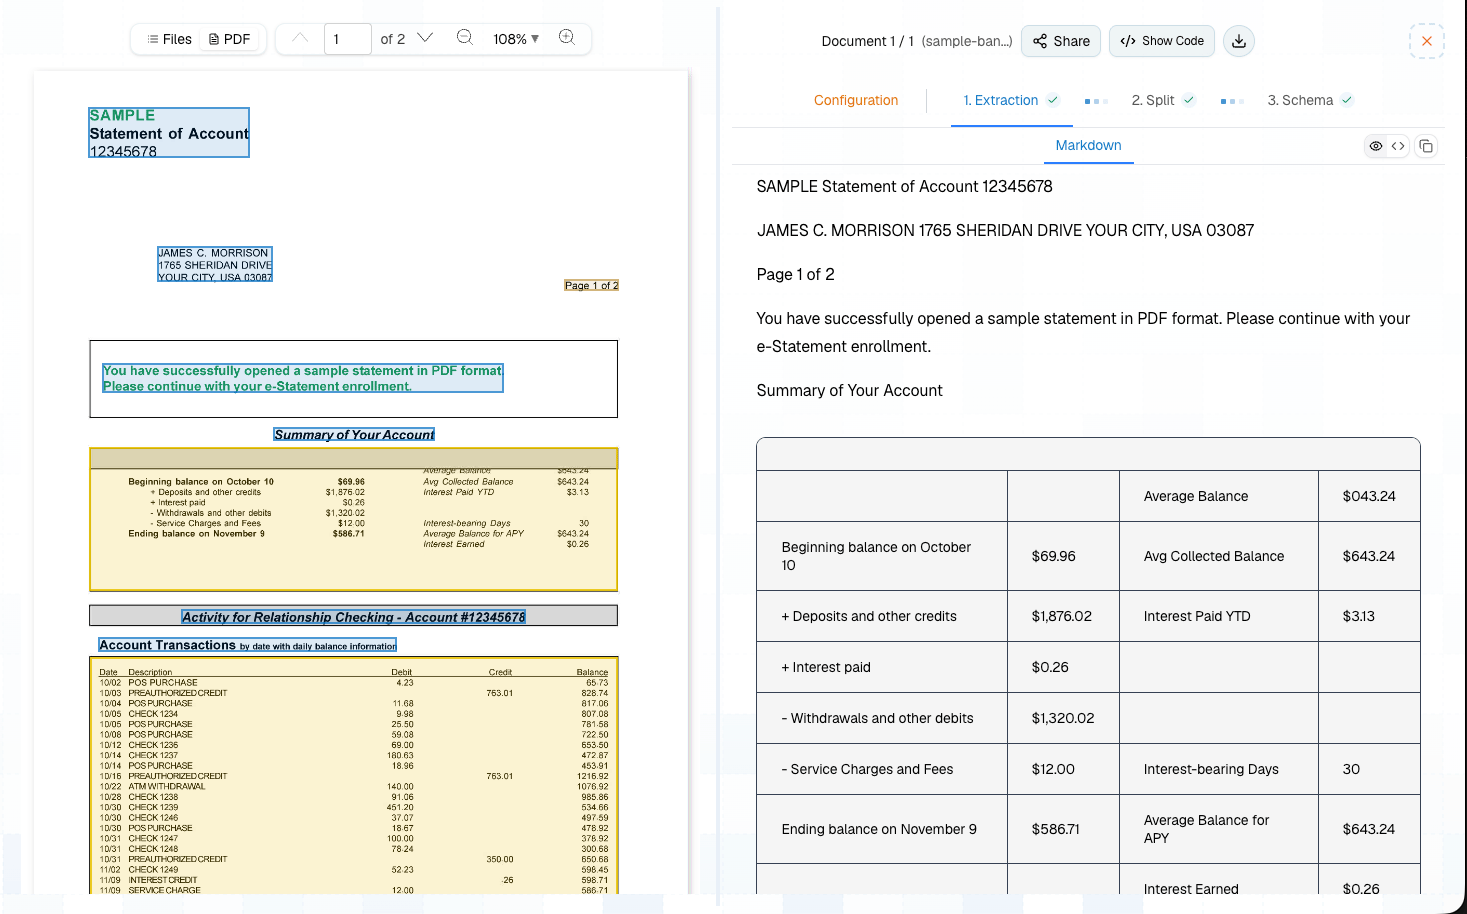
 Review the source document and output side by side before you save presets or export code.
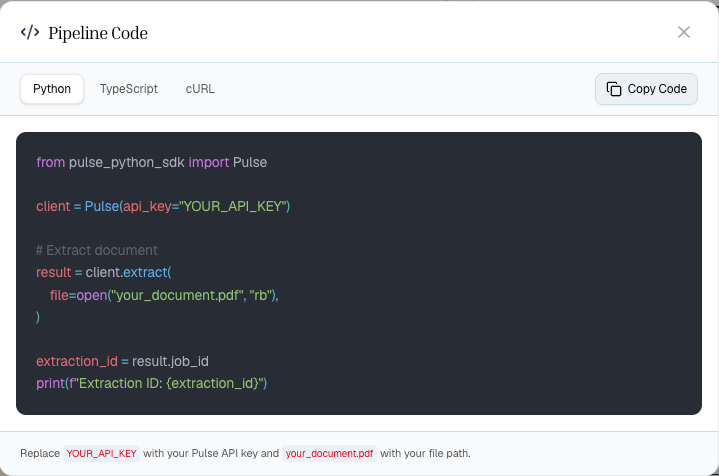
 Use Show Code when the tested pipeline is ready to move into your app.
 ## Starter Schema
```json theme={null}
{
"type": "object",
"properties": {
"invoice_number": {
"type": "string",
"description": "The invoice identifier shown by the vendor"
},
"vendor_name": {
"type": "string",
"description": "The vendor issuing the invoice"
},
"invoice_date": {
"type": "string",
"description": "The date the invoice was issued"
},
"due_date": {
"type": "string",
"description": "The payment due date"
},
"total_amount": {
"type": "number",
"description": "The final amount due"
}
},
"required": ["invoice_number", "vendor_name", "total_amount"]
}
```
## Improve The Pipeline
Once the basic flow works, make it more production-ready:
| Need | Add |
| ------------------------------- | --------------------------------------------- |
| Only certain pages matter | Page range on Extract |
| Line item tables need structure | Tables step |
| Many invoice formats | Better field descriptions and a schema prompt |
| Repeatable production config | Saved Extract and Schema presets |
| High volume | Batch or async processing |
| Long jobs | Webhooks or polling |
## Move To Code
Generated code should become the starting point for your app integration. In production, replace sample paths and keys with your own inputs and secret management.
```python theme={null}
import os
from pulse import Pulse
client = Pulse(api_key=os.environ["PULSE_API_KEY"])
result = client.extract(
file=open("invoice.pdf", "rb"),
)
schema_result = client.schema(
extraction_id=result.extraction_id,
schema_config_id="YOUR_SAVED_SCHEMA_CONFIG_ID",
)
print(schema_result.schema_output["values"])
```
## Related
A complete Extract -> Schema API recipe with a public sample document.
Use presets and Show Code well.
## Starter Schema
```json theme={null}
{
"type": "object",
"properties": {
"invoice_number": {
"type": "string",
"description": "The invoice identifier shown by the vendor"
},
"vendor_name": {
"type": "string",
"description": "The vendor issuing the invoice"
},
"invoice_date": {
"type": "string",
"description": "The date the invoice was issued"
},
"due_date": {
"type": "string",
"description": "The payment due date"
},
"total_amount": {
"type": "number",
"description": "The final amount due"
}
},
"required": ["invoice_number", "vendor_name", "total_amount"]
}
```
## Improve The Pipeline
Once the basic flow works, make it more production-ready:
| Need | Add |
| ------------------------------- | --------------------------------------------- |
| Only certain pages matter | Page range on Extract |
| Line item tables need structure | Tables step |
| Many invoice formats | Better field descriptions and a schema prompt |
| Repeatable production config | Saved Extract and Schema presets |
| High volume | Batch or async processing |
| Long jobs | Webhooks or polling |
## Move To Code
Generated code should become the starting point for your app integration. In production, replace sample paths and keys with your own inputs and secret management.
```python theme={null}
import os
from pulse import Pulse
client = Pulse(api_key=os.environ["PULSE_API_KEY"])
result = client.extract(
file=open("invoice.pdf", "rb"),
)
schema_result = client.schema(
extraction_id=result.extraction_id,
schema_config_id="YOUR_SAVED_SCHEMA_CONFIG_ID",
)
print(schema_result.schema_output["values"])
```
## Related
A complete Extract -> Schema API recipe with a public sample document.
Use presets and Show Code well.