> ## Documentation Index
> Fetch the complete documentation index at: https://docs.runpulse.com/llms.txt
> Use this file to discover all available pages before exploring further.
# Playground Walkthrough
> A guided tour of the Pulse Playground and the pipeline builder.
The Playground is where you design a document workflow before shipping it in code. It gives you the same core primitives as the API: Extract, Schema, Tables, Split, async jobs, saved presets, and generated SDK calls.
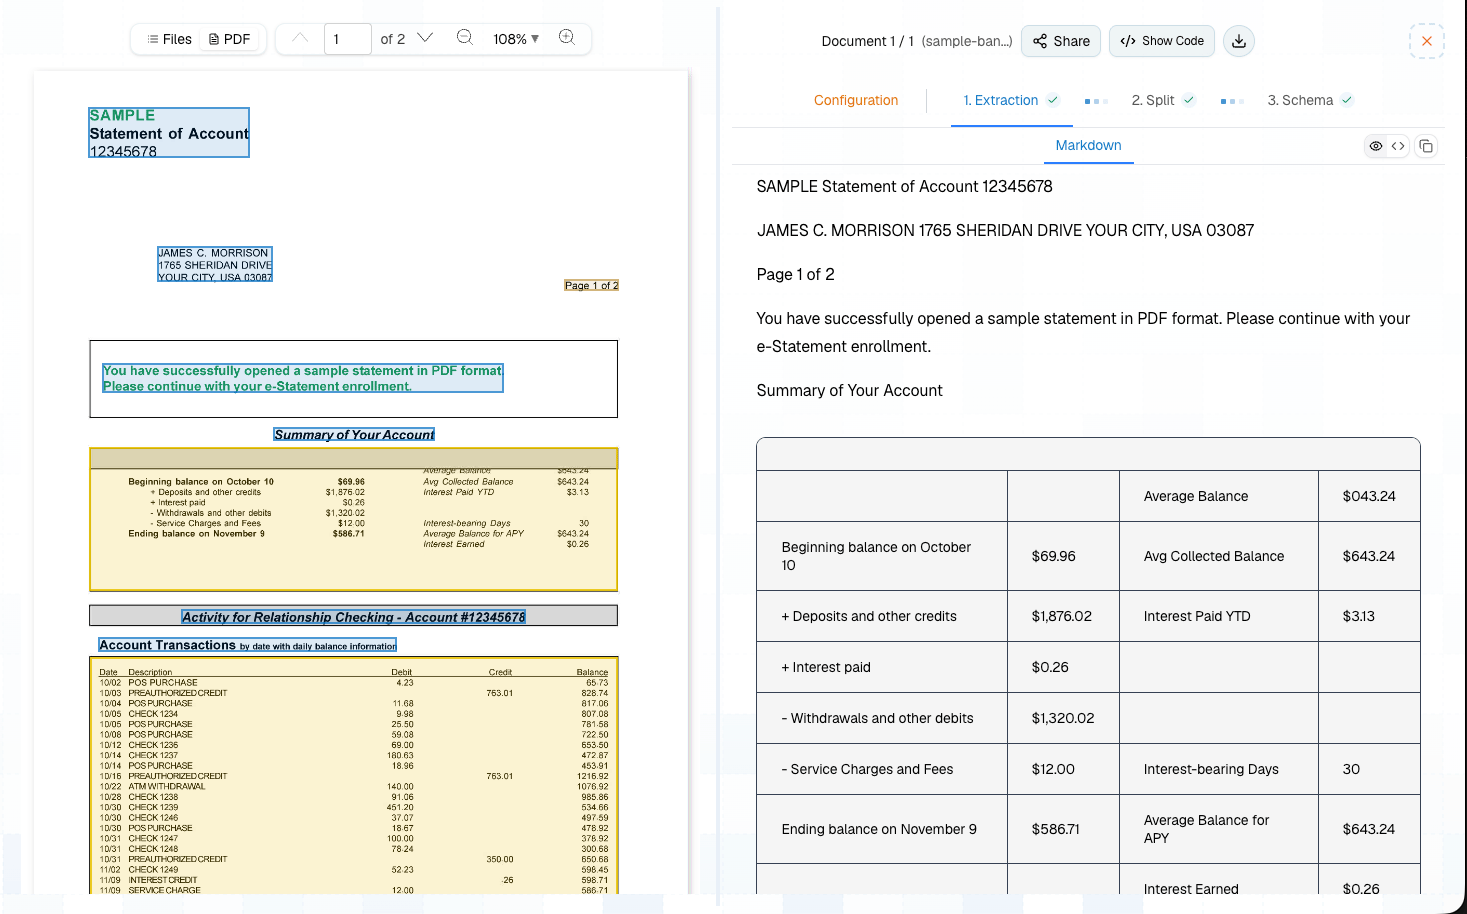
## Layout
After a run completes, the Playground keeps the original document and the extracted output side by side so you can validate citations, tables, and structured data without leaving the workflow.
 | Area | What it is for |
| --------------------- | ------------------------------------------------------------------------------------------ |
| **New Extraction** | Upload files, configure a pipeline, and run it. |
| **Pipeline steps** | Add Extract, Tables, Split, and Schema steps. |
| **Document viewer** | Compare extracted content against the original PDF or image. |
| **Output tabs** | Review Markdown, Tables, Split assignments, Schema output, citations, chunks, and figures. |
| **Pipeline Library** | Reopen saved extractions, organize folders, share outputs, and rerun steps. |
| **Developer section** | Manage API keys and usage. |
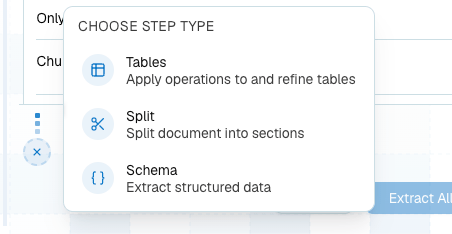
## Pipeline Builder
Every new run starts with Extract. From there, add the step that matches the output you need.
| Area | What it is for |
| --------------------- | ------------------------------------------------------------------------------------------ |
| **New Extraction** | Upload files, configure a pipeline, and run it. |
| **Pipeline steps** | Add Extract, Tables, Split, and Schema steps. |
| **Document viewer** | Compare extracted content against the original PDF or image. |
| **Output tabs** | Review Markdown, Tables, Split assignments, Schema output, citations, chunks, and figures. |
| **Pipeline Library** | Reopen saved extractions, organize folders, share outputs, and rerun steps. |
| **Developer section** | Manage API keys and usage. |
## Pipeline Builder
Every new run starts with Extract. From there, add the step that matches the output you need.
 ```mermaid theme={null}
flowchart LR
A[Extract] --> B[Tables]
A --> C[Schema]
A --> D[Split]
D --> E[Schema per topic]
D --> F[Tables per topic]
```
Use the right-side configuration panel to tune each step before running the pipeline.
```mermaid theme={null}
flowchart LR
A[Extract] --> B[Tables]
A --> C[Schema]
A --> D[Split]
D --> E[Schema per topic]
D --> F[Tables per topic]
```
Use the right-side configuration panel to tune each step before running the pipeline.
 ## Extract Step
Use Extract to parse the document into reusable content.
## Extract Step
Use Extract to parse the document into reusable content.
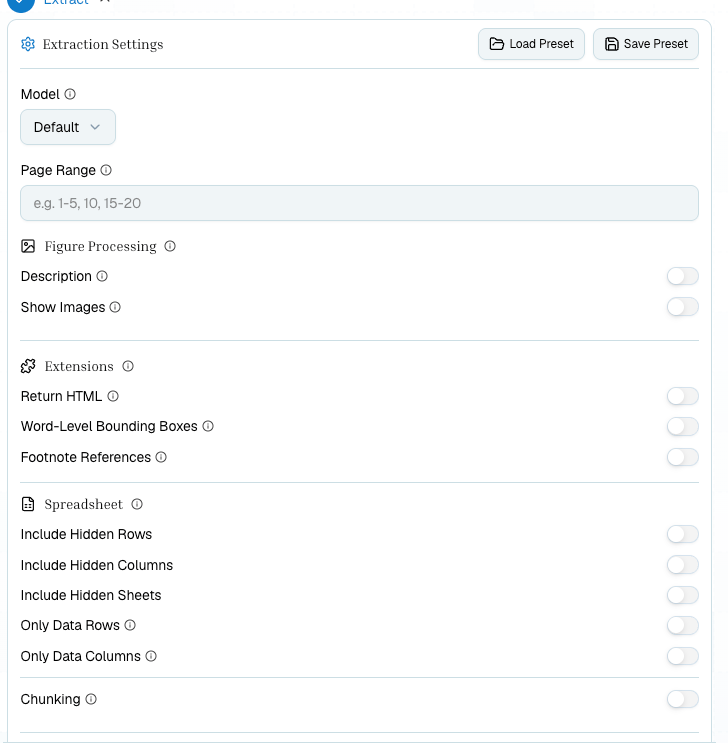 | Setting | Use when |
| ------------------- | ----------------------------------------------------------- |
| Page range | You only need known pages, such as `1-5` or `3,7,12`. |
| Figure descriptions | Charts, diagrams, or screenshots need textual descriptions. |
| Show images | You want image URLs or inline visual assets in the output. |
| Return HTML | Your downstream renderer prefers HTML over markdown. |
| Chunking | You are preparing content for search, RAG, or retrieval. |
| Spreadsheet options | Hidden rows, columns, or sheets matter for Excel files. |
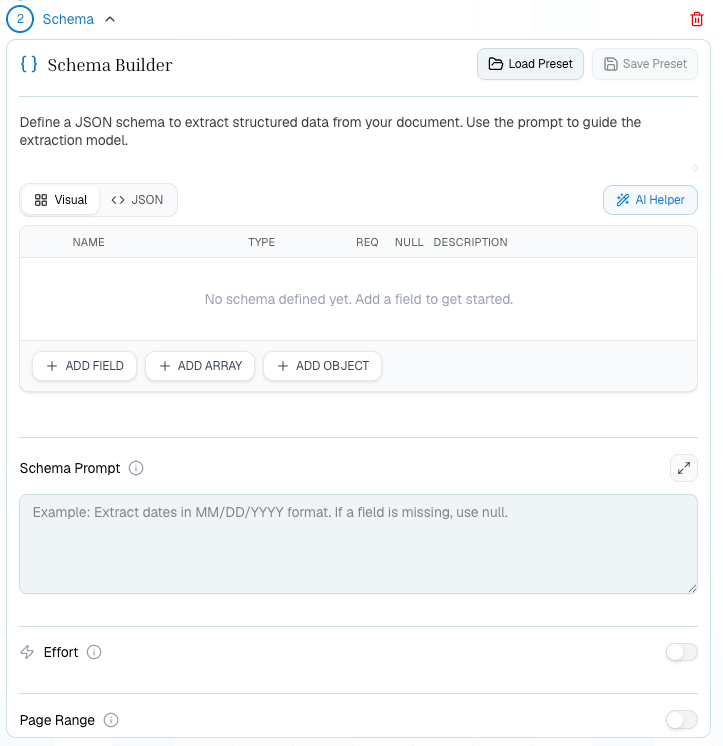
## Schema Step
Use Schema to extract named fields into JSON. The editor supports generated schemas, manual editing, field descriptions, schema prompts, saved presets, and reruns.
Use it for invoices, forms, contracts, policies, statements, and any document where a known output shape is more important than preserving full table layout.
| Setting | Use when |
| ------------------- | ----------------------------------------------------------- |
| Page range | You only need known pages, such as `1-5` or `3,7,12`. |
| Figure descriptions | Charts, diagrams, or screenshots need textual descriptions. |
| Show images | You want image URLs or inline visual assets in the output. |
| Return HTML | Your downstream renderer prefers HTML over markdown. |
| Chunking | You are preparing content for search, RAG, or retrieval. |
| Spreadsheet options | Hidden rows, columns, or sheets matter for Excel files. |
## Schema Step
Use Schema to extract named fields into JSON. The editor supports generated schemas, manual editing, field descriptions, schema prompts, saved presets, and reruns.
Use it for invoices, forms, contracts, policies, statements, and any document where a known output shape is more important than preserving full table layout.
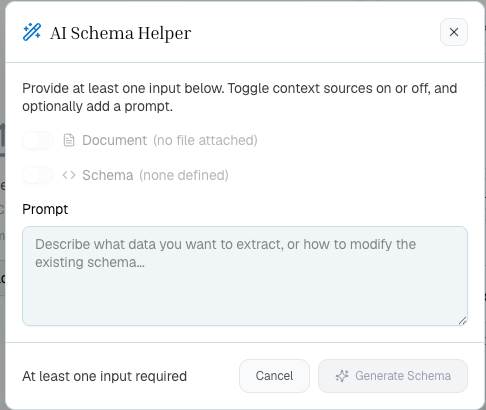
 Use the AI helper when you want Pulse to draft a schema from a short prompt, the attached document, or an existing schema.
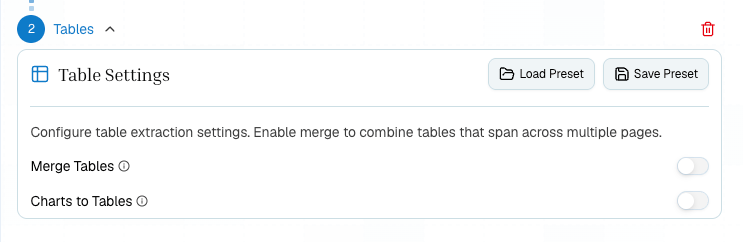
 ## Tables Step
Use Tables when the table is the product. Enable merge for cross-page tables and chart-to-table conversion when charts contain values you want in rows and columns.
## Tables Step
Use Tables when the table is the product. Enable merge for cross-page tables and chart-to-table conversion when charts contain values you want in rows and columns.
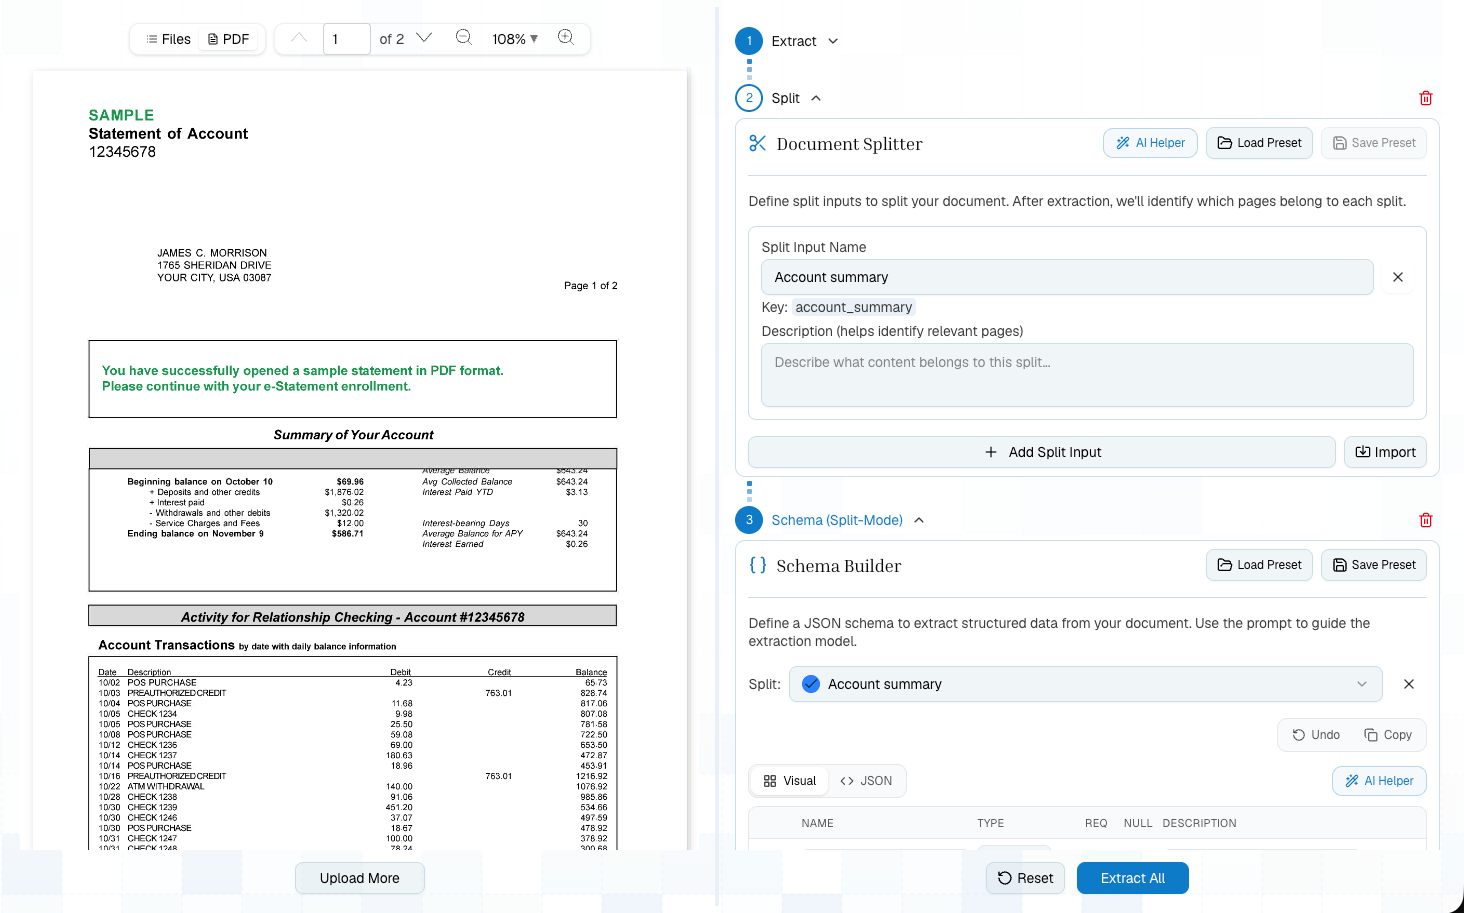
 ## Split Step
Use Split when a long document contains sections that need different treatment. Split topics should be clear and mutually distinct. After Split, you can apply per-topic schemas or table extraction.
## Split Step
Use Split when a long document contains sections that need different treatment. Split topics should be clear and mutually distinct. After Split, you can apply per-topic schemas or table extraction.
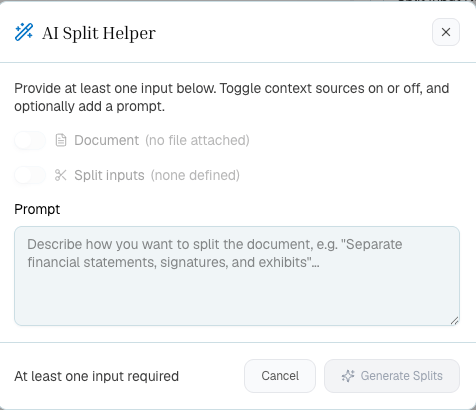
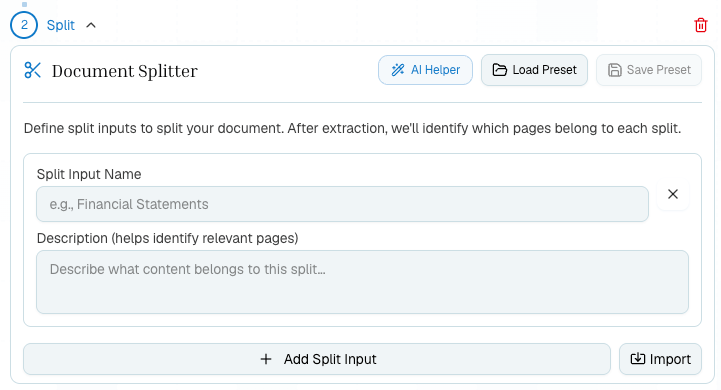 Use the AI helper to draft split topics from a prompt, the attached document, or existing split inputs.
 ## Presets
Presets let you reuse stable configurations:
| Preset | Stores |
| -------------- | -------------------------------------------------------------------------------- |
| Extract preset | Extraction settings like page range, chunking, figures, and spreadsheet options. |
| Split preset | Topic names and descriptions. |
| Schema preset | JSON Schema, descriptions, and schema prompt. |
| Tables preset | Merge, table format, chart conversion, and related table options. |
Use inline configs while exploring. Save presets once the workflow is stable.
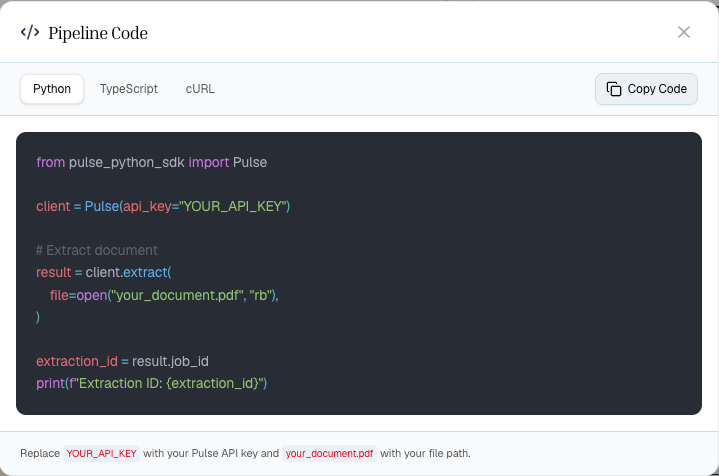
## Show Code
Show Code generates Python, TypeScript, or cURL from the current pipeline. If a step uses a saved preset, generated code references the config ID instead of inlining the full config.
## Presets
Presets let you reuse stable configurations:
| Preset | Stores |
| -------------- | -------------------------------------------------------------------------------- |
| Extract preset | Extraction settings like page range, chunking, figures, and spreadsheet options. |
| Split preset | Topic names and descriptions. |
| Schema preset | JSON Schema, descriptions, and schema prompt. |
| Tables preset | Merge, table format, chart conversion, and related table options. |
Use inline configs while exploring. Save presets once the workflow is stable.
## Show Code
Show Code generates Python, TypeScript, or cURL from the current pipeline. If a step uses a saved preset, generated code references the config ID instead of inlining the full config.
 This is the recommended bridge from Platform to production:
1. Build the workflow visually.
2. Test it on representative documents.
3. Save stable presets.
4. Generate code.
5. Put the generated chain behind your own app, queue, or data pipeline.
## Related
A hands-on Platform tutorial.
Decide which steps to add.
Save and reuse configs.
Turn Playground work into SDK calls.
This is the recommended bridge from Platform to production:
1. Build the workflow visually.
2. Test it on representative documents.
3. Save stable presets.
4. Generate code.
5. Put the generated chain behind your own app, queue, or data pipeline.
## Related
A hands-on Platform tutorial.
Decide which steps to add.
Save and reuse configs.
Turn Playground work into SDK calls.